Thermal nails have been the go-to trend summer. And they’re still heating things up this fall! Let’s dive into this easy tutorial and get those nails shifting fall shades.✨
Step-by-Step Tutorial:
1. Prep Your Nails & Apply Base Coat
Start with clean nails! Push back your cuticles, shape your nails, and lightly buff the surface for better polish adhesion. Wipe down with a nail cleanser or alcohol wipe to remove dust and oils.Apply a thin layer of base coat to protect your natural nails. Cure under the UV/LED lamp according to the base coat’s instructions.
2. Apply Thermal Gel Polish
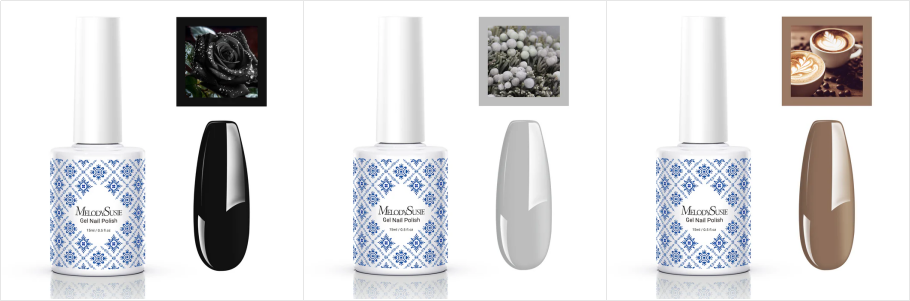
Time for the fun part! Apply the Fluerwee Nail Gel Polish layer by layer, from light to dark. (Shade P3, P18, P27, P30 & P4)
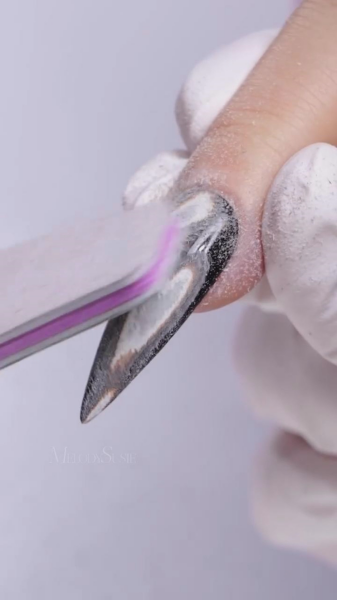
3. File it
File it to create the thermal effect.
4. Seal It with Top Coat
Seal in your gorgeous thermal design with a layer of top coat. This step adds shine and durability. Cure under the lamp to finish. You can also click here to view the tutorial video.
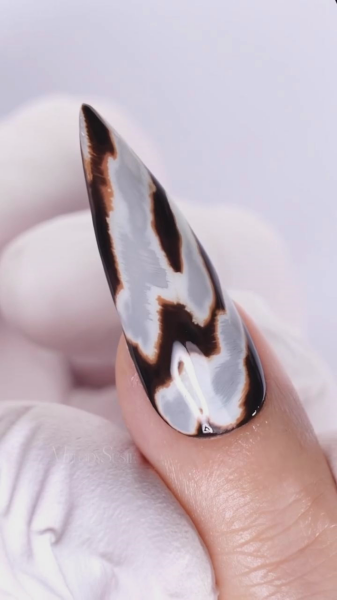
Show off your thermal nails! We can’t wait to see your fall twist on this summer fave! 🍂💅
#fallnails#nailtutorial#thermalnails